Every year I choose some new technique to dye Easter eggs. There were eggs
dyed in food colour, naturally coloured in onion peels, spinach or red cabbage,
drawn with wax and melted crayons... Or just dyed and decorated with some
stickers.

This year I wanted to make some decoupage eggs. I could find many pretty
napkins with Easter ornaments, flowers and other pretty little pictures. That's
easy, but I wanted some graphic ornaments to make some unique eggs. No, there
aren't napkins with such ornaments. I just found them browsing pictures on the
net and decided to print them. And make my own unique decoupage napkins.
To do that, I needed the usual printing paper and double-layered paper
towels. One piece of paper towel I just glued with the paper glue to the printing paper. This paper I
used to print the ornament I chose. It looked like this:
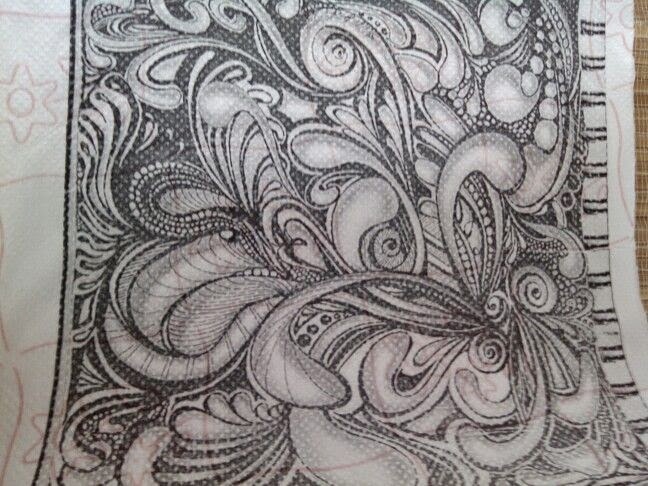


When the ornament is printed, I could peel off the first, printed layer of
the paper towel. This thin piece of printed paper I used for my decoupaged
eggs. I tried to do this on dyed eggs (in light red colour) and on natural
eggs. Both of them seems amazing to me.
Decoupage for Easter eggs is not made in usual way for decoupage, for this
has to be edible. We use an egg white as a natural glue. Just scramble it with
the fork and spread it on the egg with the small brush. Now you can put the
picture on the egg. Just wrap it around and cut the parts you don't need and overlapping
parts. Gently press it on the egg with a kitchen sponge and let it dry.
Here are my decoupaged eggs, I am absolutely going to make some more, I
enjoyed decorating them :)


We have chickens that lay colored eggs. It makes it very simple for Easter. :) Good to see you writing....keep up the good work.
ReplyDelete